
Alphabetical Index
Keyword Search
Casting Defects
Ingot Defects
Slab Defects
Drawing Defects
Forging Defects
Rolling Defects
Bearing Defects
Coating Defects
Corrosion Defects
Fractography
Heat Treatment Defects
Machining Defects
Other Defects
Pipeline Defects
Polishing Defects
Rail Defects
Tool Steel Defects
Welding Defects
Internal Defects
New Records
Surface Defects
Contact Us
Help
Home
Flat shoulder tool welded plate - Welding defects
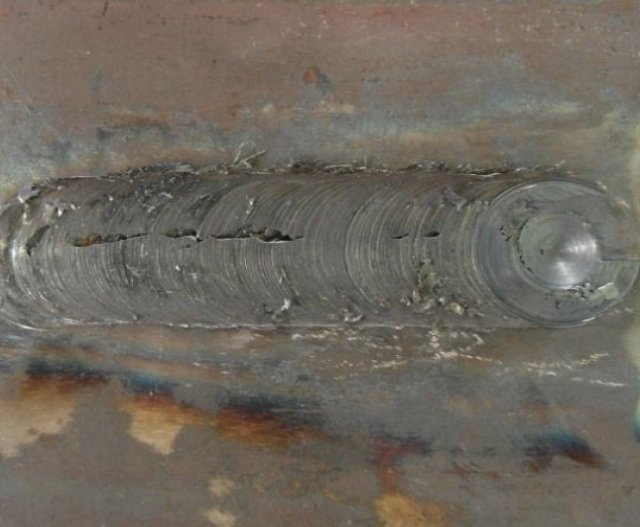
Figure 1: Appearance of flat shoulder tool welded plate.
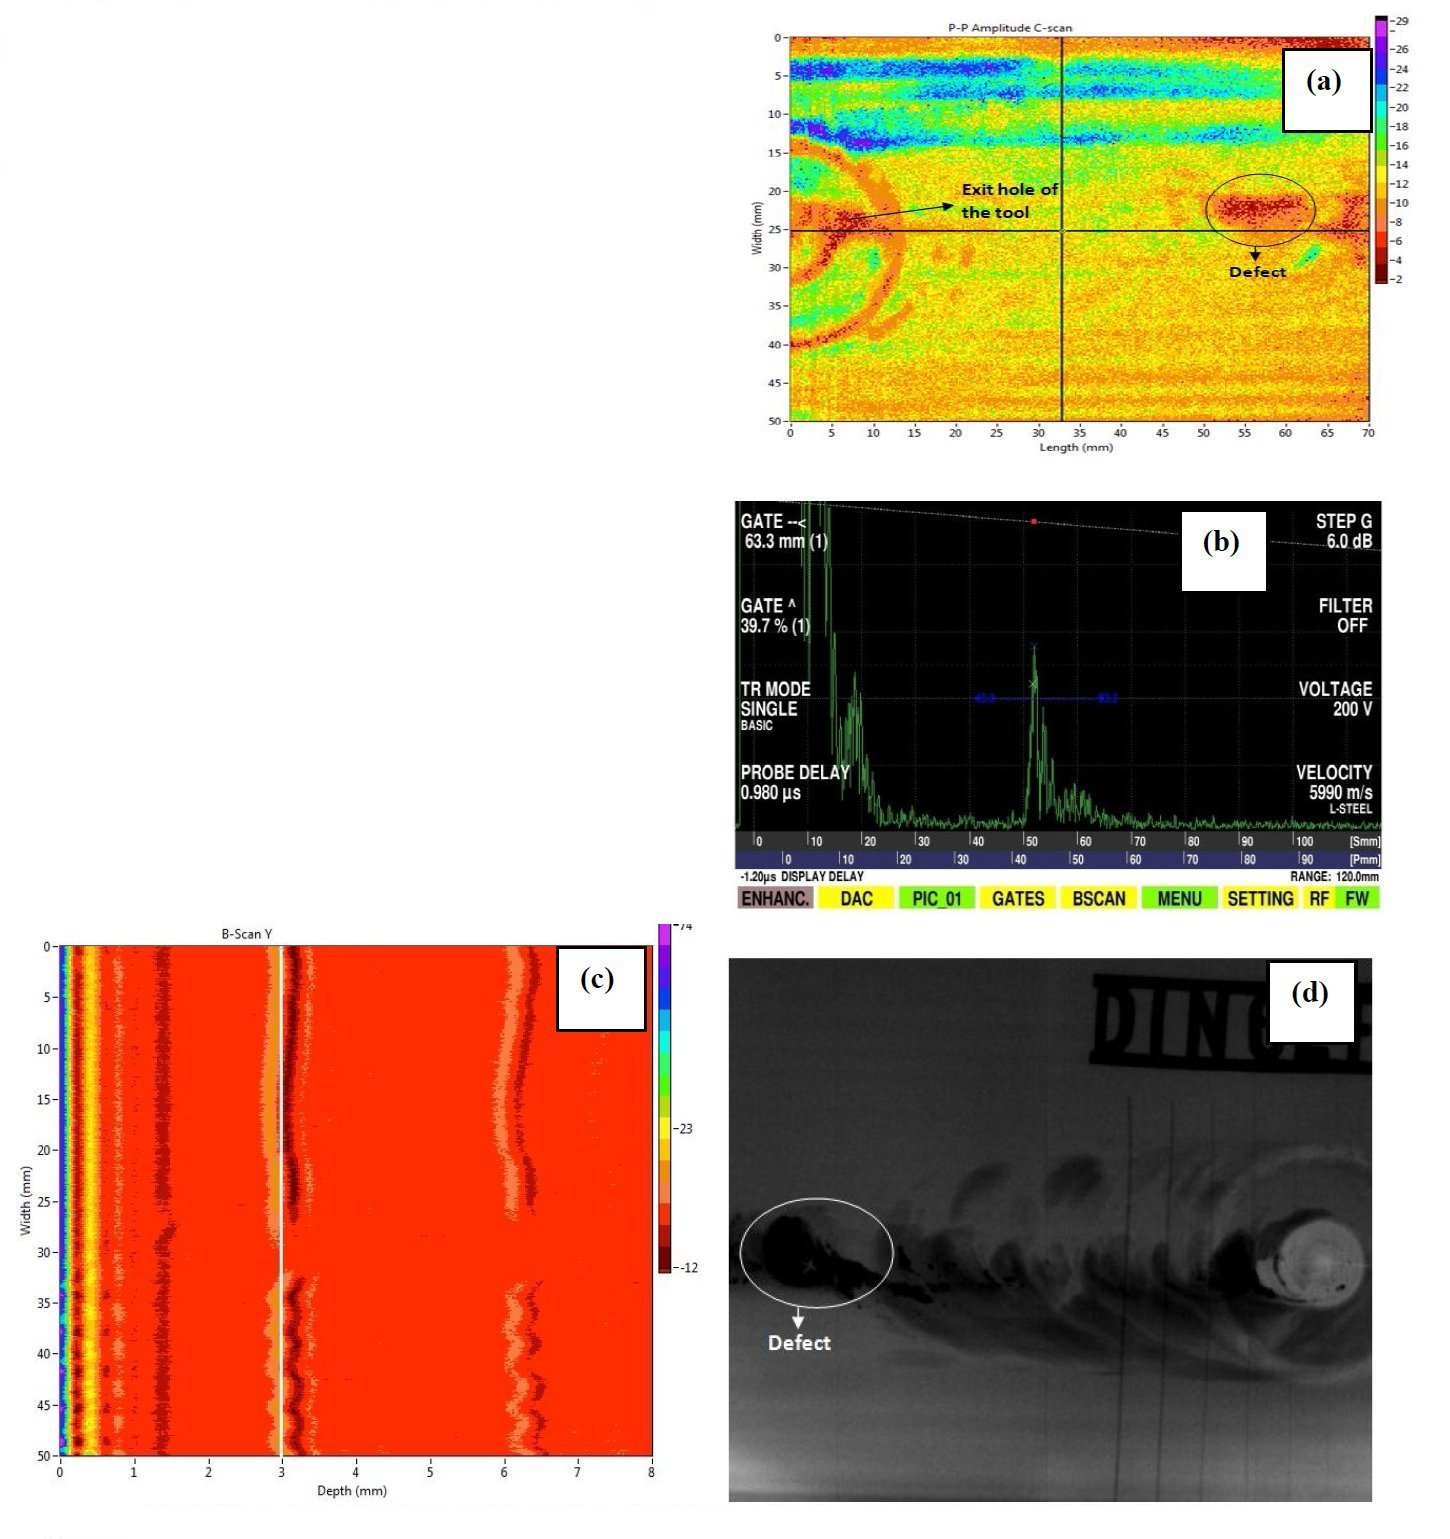
Figure 2: Flat shoulder tool welded plate (a) C scan (b) A scan (c) B scan (d) Radiography.
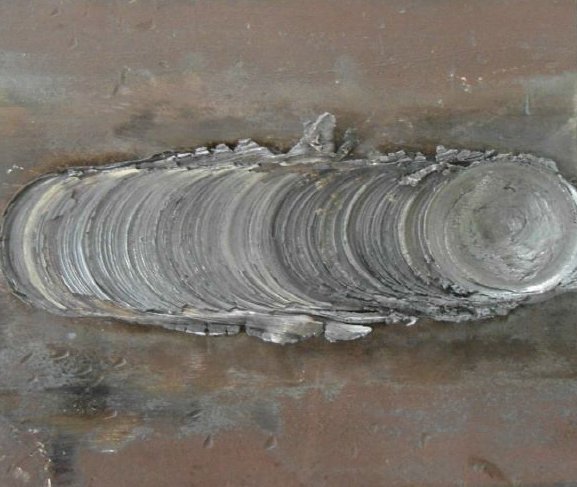
Figure 3: Appearance of concave shoulder tool welded plate.
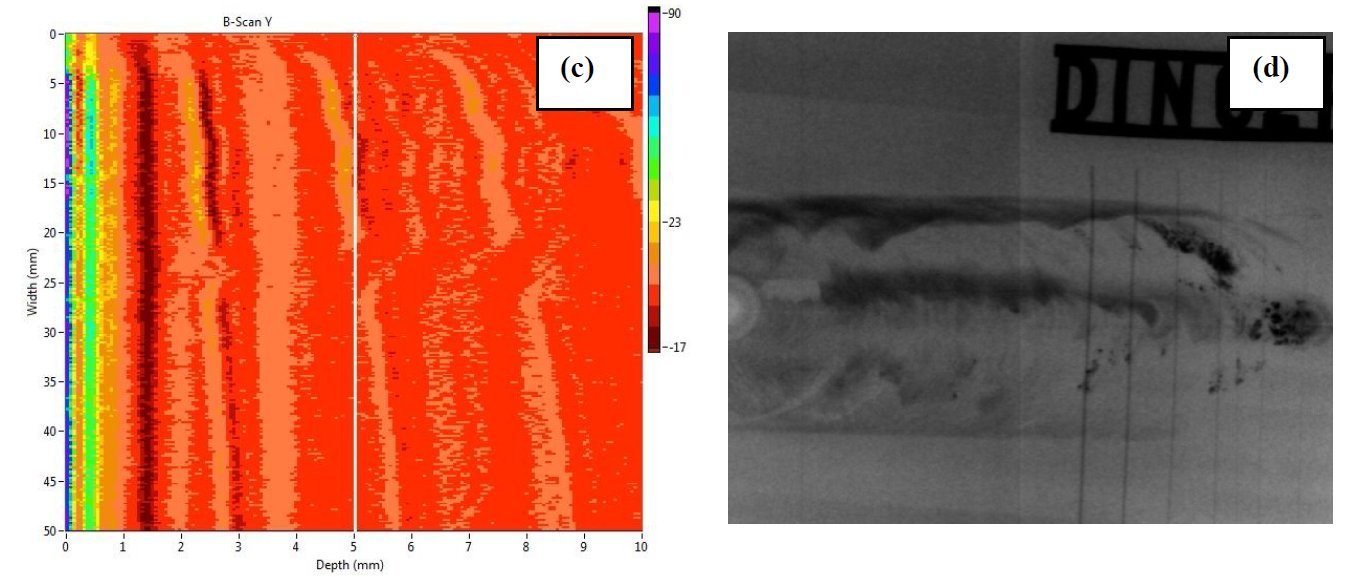
Figure 4: Concave shoulder tool welded plate (a) C scan (b) A scan (c) B scan (d) Radiography.
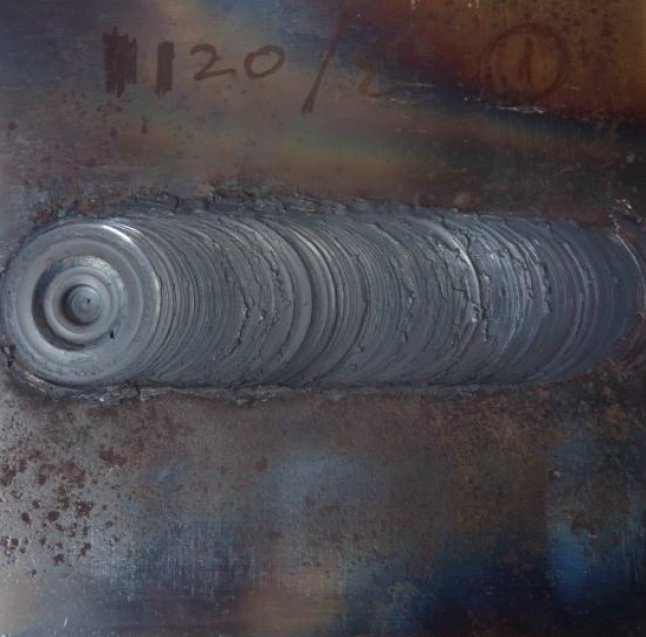
Figure 5: Appearance of Sub shoulder welded plate.
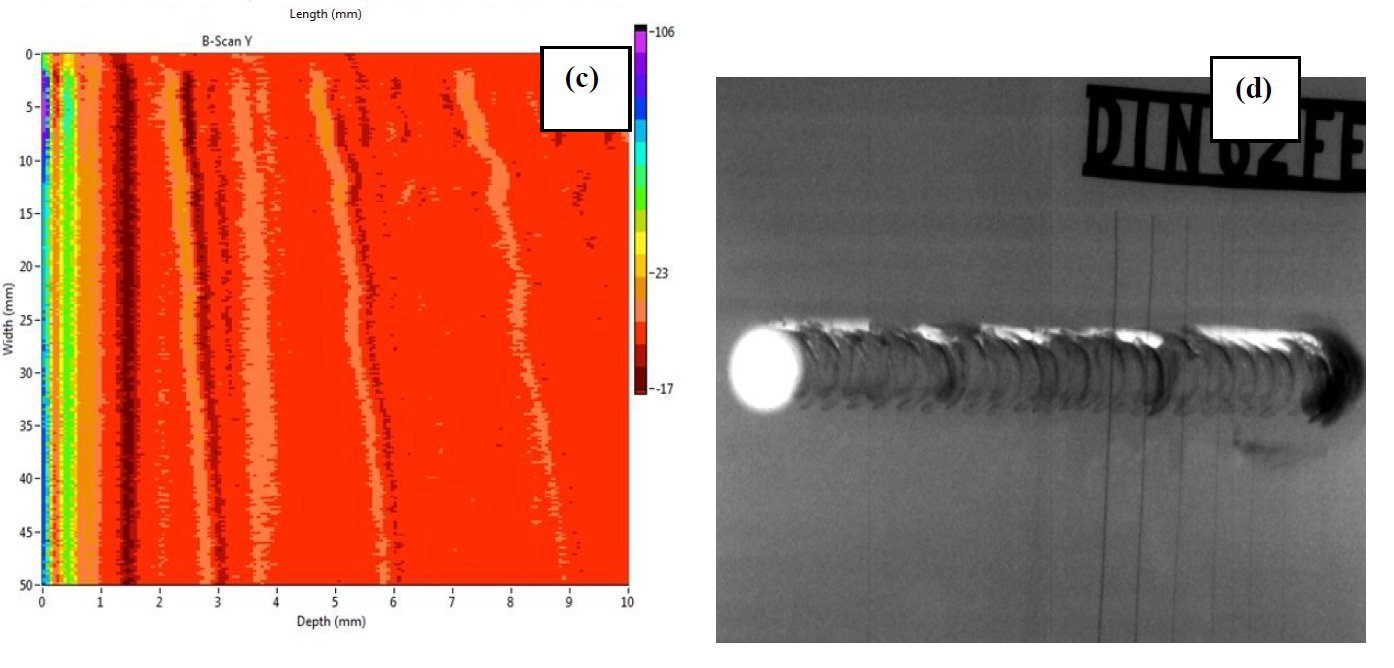
Figure 6: Sub shoulder tool welded plate (a) C scan (b) A scan (c) B scan (d) Radiography.
Defect name: Voids
Record No.: 1914
Type of defect (Internal/Surface): Internal, surface
Defect classification: Welding defects
Steel name: Steel
Steel composition in weight %: See the text bellow.
Note: Tool design in Friction stir welding (FSW) of steel is a critical problem and hence experiments were carried on
with three combinations of tool profiles having tapered pin, concave and flat shoulders. The study of tool wear resulted in a
new finding of Sub shoulder tool and gave reduced tool wear. The tool wear is indirectly being reduced by using a shorter
pin length of 2.6mm. Rupture of material surfaces which were in contact created reduction in the tool geometry and defect
on welds were obtained. Based on the tool shape corresponding to its weld length, defects were occurred in the weld zone.
This study is concentrated on finding the possible defects during welding by using different tool profiles using ultrasonic,
radiography and thermography techniques. It was observed from the weld that the flat shoulder gave improper joining
defects while the concave shoulder gave reduced defects when compared to flat shoulder, and the Sub shoulder is defect free.
Friction stir butt weld was conducted using IS:
3039, grade II (0.204 wt% C, 0.129 wt% Si, 1.10
wt% Mn, 0.309 wt% Cr) low alloy steel plates,
having dimensions of 100 x 50 x 3 mm. A modified
vertical milling machine was used to perform this
Friction Stir Welding (FSW) processes. In this
investigation Tungsten alloy tool (W-5.7908Ni-
3.2318Fe-0.2228Mo-0.1214Co-0.0709O2 wt-%) was
used to perform the tool wear study. Shorter pin
length of 2.6 mm, shoulder diameter of 25 mm, and
pin diameter of 12mm at the root and 4 mm at the tip
were maintained as constant.
Flat shoulder tool: The surface of flat shoulder will be completely been
in contact with the work piece surface. The frictional
contact of this flat surface might produce higher
temperature, which makes the material to its plastic
material flow quickly. In terms of tool wear for steel
plates, this flat surface rubs over the interface surface
and results in higher tool wear rate when compared to other profiles. Defective Weld is formed by using this
flat shoulder. Appearance of welded sample is shown
in Fig. 1.
The surface of the welded sample found to
have voids on the upper surface itself. At the bottom
of the welded plate, there is a root defect. The marked
region opposite to the exit hole shows higher
attenuation, which represents the defect in the particular region as shown in Fig.2 (a) and this, is the
C – scan image of flat shoulder.
The defect is a void shown in a circle. The defect is at
a depth of 2.8 mm which is shown in the A – scan
image of Fig.2 (b). In the weld length, at 25mm cross section as shown in
Fig.2(c) indicates the defect region with a variation in
the signals. The B – scan image shows the defect is at
a depth of 2.8 mm and size of the defect is 11 x 5mm.
The radiograph reveals that there is void at the
marked position as shown in the Fig.2 (d).
Sub shoulder tool: During the experiments conducted on concave
shoulders, a step like formation was naturally
occurred and this was developed as a new tool design
tool and has been named as sub shoulder. It was
found that the tool could produce 1200 mm length of
weld, which was the highest weld length among the
other tools that could travel. The welded plate by sub
shoulder tool is shown in Fig.3 and found with defect
free.
Concentric circles can be seen over the plate
surface. This is the metal flow because of first mode
of metal transfer, as shown in Fig.4 (a) and roughness
in surface is clearly seen in A-scan image of Fig.4
(b). However, the welded plates are found to befree
from defects along the thickness of the weld, and this
is assured from the B-scan image as shown in
Fig.4(c). Ultrasonic images show that there is no
defect along the weld length.
Exit hole is visible on the radiograph as shown in
Fig.4 (d). Except the initial plunge impression of tool From the results of NDT techniques, Sub shoulder
tool is found to be free from defects. Flash on welded
plates cannot be considered as defect, if it is in
allowable limits and this does not affect the weld
formation. All the welded plates of flat shoulder were
found with tunnel defect and surface irregularities.
Lack of material flow and poor tool design are the
reasons for such defect. Among the tool profiles, flat
shoulder tool is found to give maximum number of
defects.
Reference: Not shown in this demonstration version.