Alphabetical Index
Keyword Search
Casting Defects
Ingot Defects
Slab Defects
Drawing Defects
Forging Defects
Rolling Defects
Bearing Defects
Coating Defects
Corrosion Defects
Fractography
Heat Treatment Defects
Machining Defects
Other Defects
Pipeline Defects
Polishing Defects
Rail Defects
Tool Steel Defects
Welding Defects
Internal Defects
New Records
Surface Defects
Contact Us
Help
Home
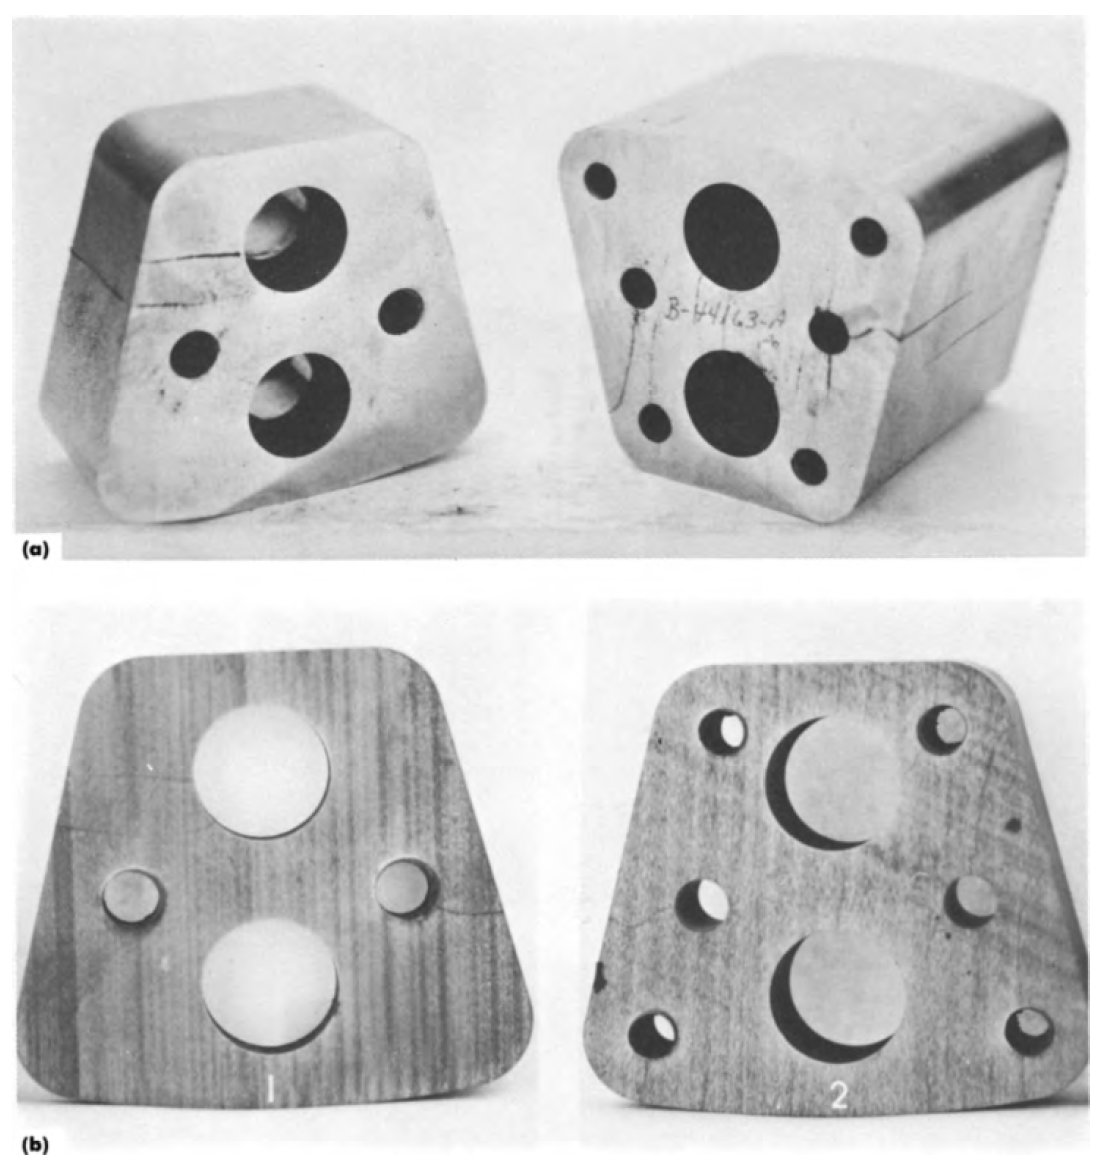
Grinding cracks caused by failure to temper a part - Machining defects - Fractography

Figure 1: (a) Two dies made from AISI D2 tool steel that cracked after finish grinding (cracks accentuated with magnetic
particles), (b) Macroetching (10% aqueous nitric acid) of the end faces revealed grinding scorch. These dies were
not tempered after hardening.
Defect name: Grinding cracks
Record No.: 2329
Type of defect (Internal/Surface): Surface
Defect classification: Machining defects, fractography
Steel name: AISI D2 tool steel
Steel composition in weight %: No data.
Note: Failures due to finish grinding. Cracking
due to the stresses and microstructural
alterations caused by grinding is a relatively
common problem. In many cases, the grinding
technique is not at fault, because the
microstructure of the part rendered it sensitive
to grinding damage due to failure to temper
the part or because the part was overaustenitized
and contained substantial unstable retained
austenite.
Figure 10 shows an example of grinding
cracks due to failure to temper the part. Two
AISI D2 tool steel dies, which measured
57 x 60 x 29 mm or 51 mm thick
(2'A x 23/8 x l'/8 in. or 2 in. thick), were
observed to be cracked after finish grinding.
The cracks are emphasized with magnetic particles.
Macroetching of the surfaces revealed
the classic scorch pattern indicative of abusive grinding. The failure, however, was not due to
poor grinding practice, but was caused by
failure to temper the dies. The interior hardness
was 63 to 64 HRC, typical for as-quenched D2.
The scorched surface was back tempered to 55
to 58 HRC. It is difficult to grind as-quenched
high-hardness tool steels without damaging the
surface.
Reference: Not shown in this demonstration version.