
Alphabetical Index
Chemical Composition of Steels
Keyword Search
Steel Names
Alloyed Steels
Carbon Steels
Cast Irons
Chromium Steels
Cold Work Tool Steels
Creep Resistant Steels
Hot Work Tool Steels
Molybdenum Steels
PM steels
Stainless Steels
Structural Steels
Tool Steels
Vanadium Steels
White Cast Irons
M2C Carbides
M3C Carbides
M7C3 Carbides
M23C6 Carbides
MC Carbides
Light Microscopy
EDS/WDS Microanalysis
Scanning Electron Microscopy
Transmission Electron Microscopy
X-Ray Diffraction
Help
Contact Us
Home
M3C, M7C3 and M4C3 carbides in X40CrMoV5-1 steel
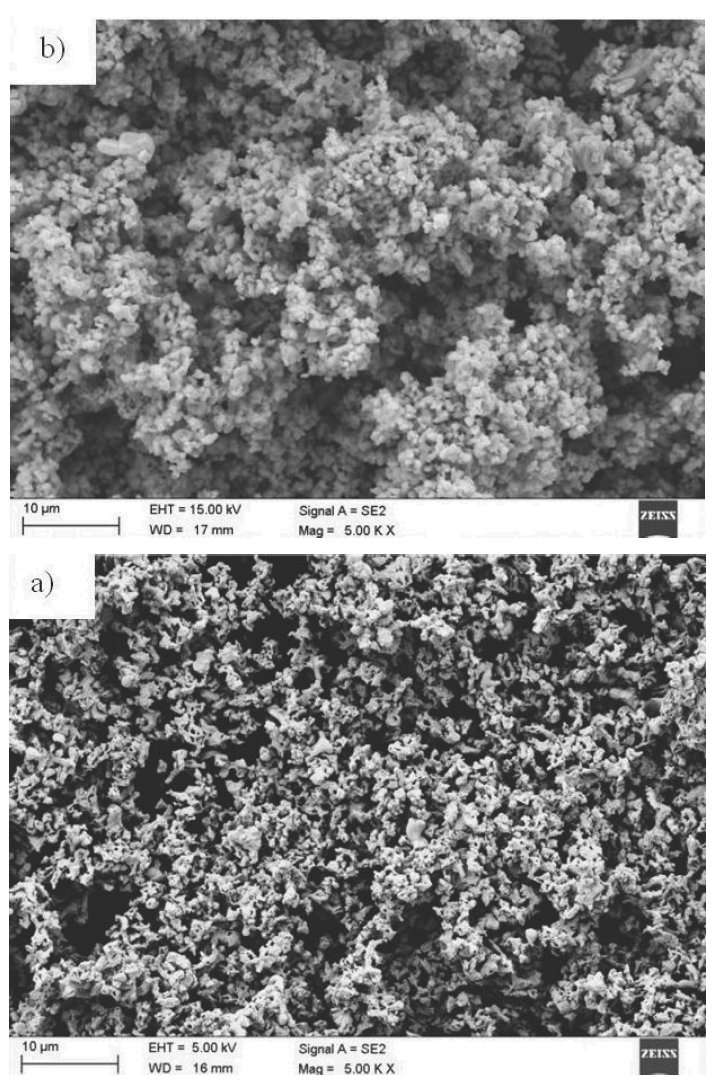
Figure 1: a) Vanadium carbide powder, b) Tantalum carbide powder (SEM). Scale bar: 10 µm.
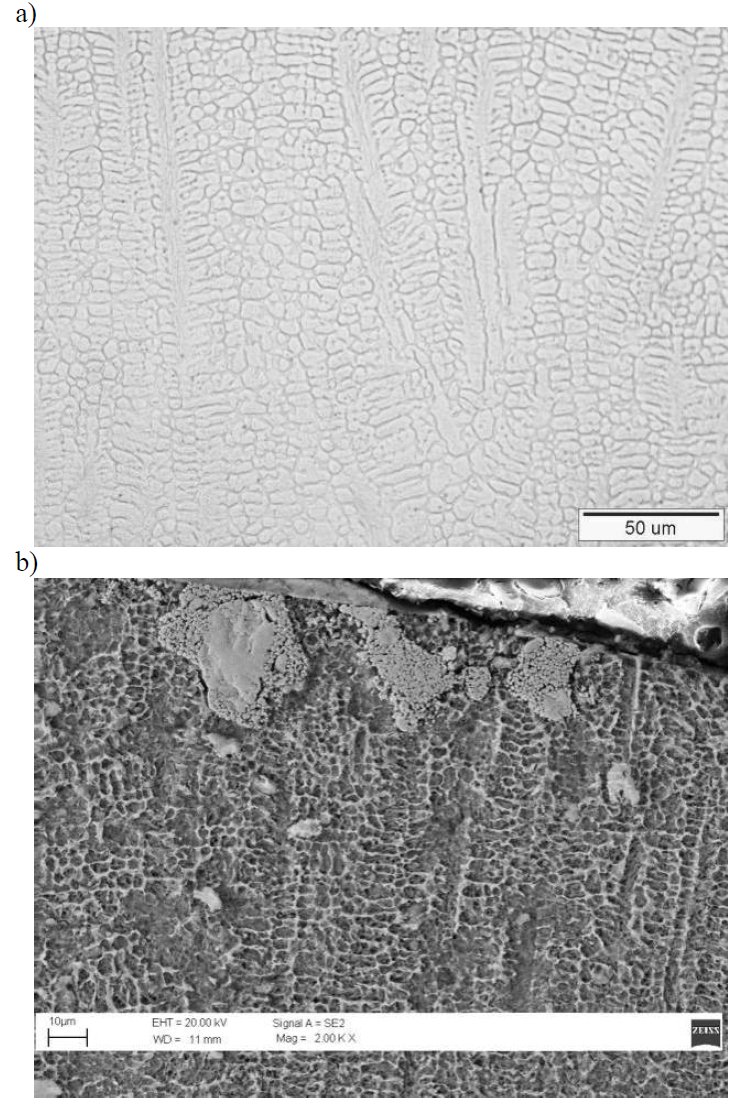
Figure 2: The structure of the X40CrMoV5-1 hot work tool steel alloyed with TaC, scanning rate 0.5 m/min., a) power range 2.0 kW., b) power range 1.6 kW, (SEM). Scale bars: 50, 10 µm.
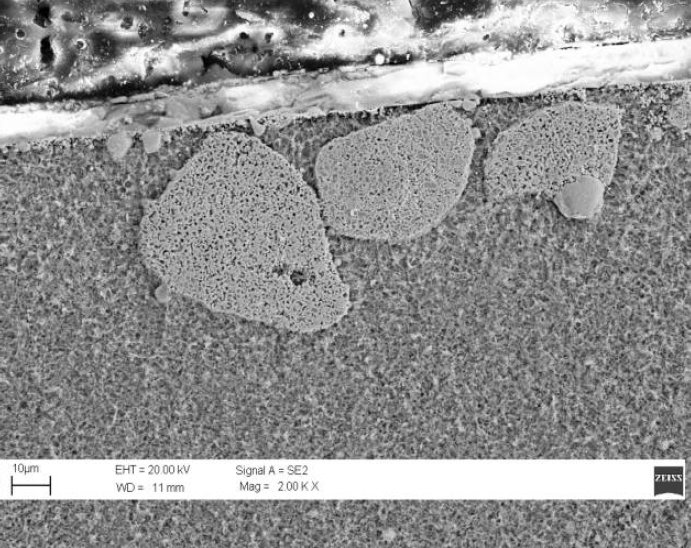
Figure 3: The structure of the X40CrMoV5-1 hot work tool steel alloyed with TaC, scanning rate 0.5 m/min., power range 1.2 kW. Scale bars: 10 µm.
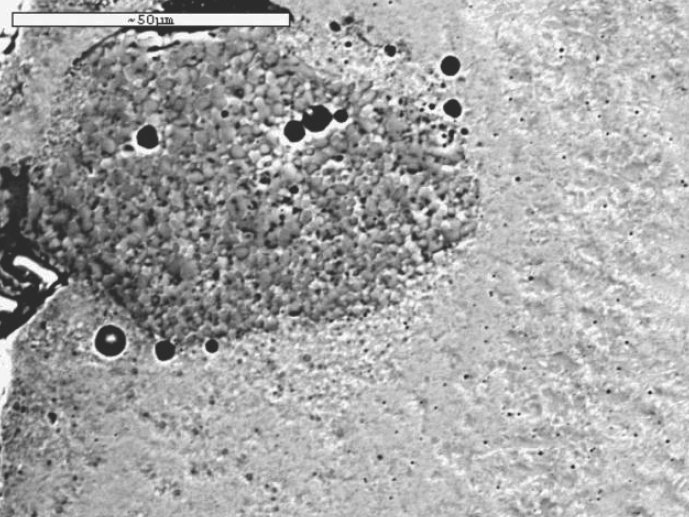
Figure 4: Alloying material in the surface layer of the X40CrMoV5-1 steel alloyed with the VC powder, power range 1.2 kW, (SEM). Scale bar: 50 µm.
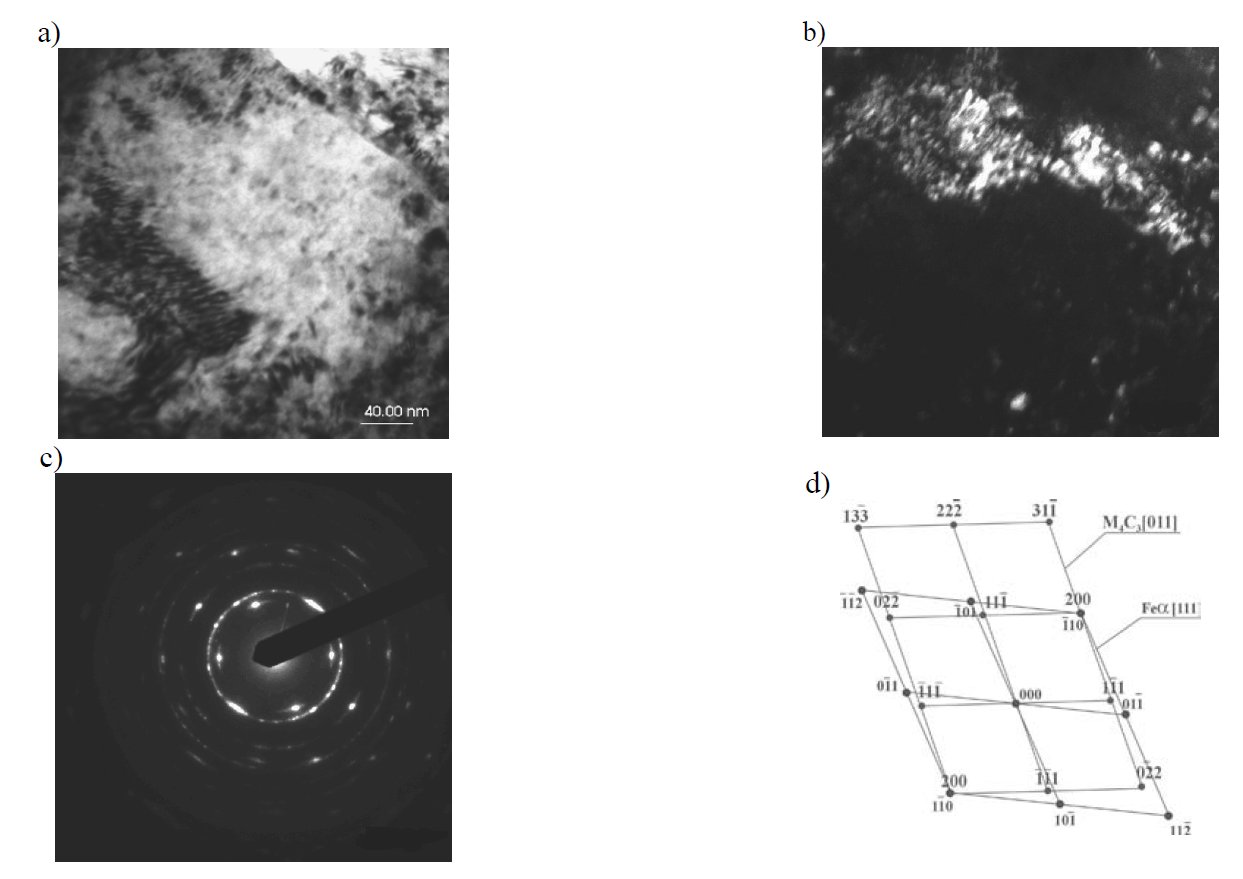
Figure 5: Thin foil structure of X40CrMoV5-1 steel, after alloying with VC, power of bunch laser 1.6 kW: a) a bright field image, b) a dark
field image, c) a diffraction pattern of area in fig. a), d) a solution of diffraction pattern from fig. c). Scale bar: 40 nm.
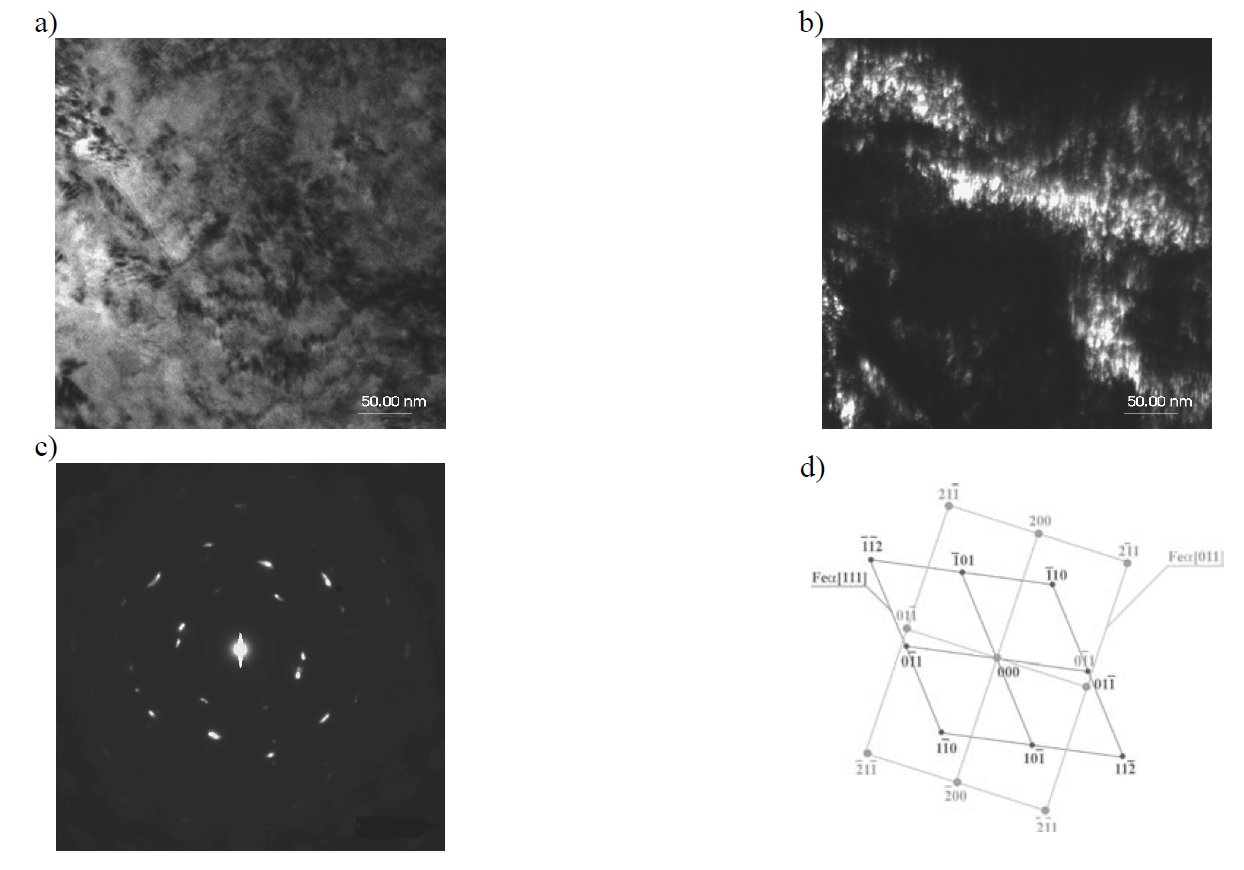
Figure 6: Thin foil structure of X40CrMoV5-1 steel, after alloying with TaC, power of bunch laser 1.6 kW: a) a bright field
image, b) a dark field image, c) a diffraction pattern of area in fig. a), d) a solution of diffraction pattern from fig. c). Scale bar: 50 nm.
Carbide name: M3C, M7C3, M4C3
Record No.: 746
Carbide formula: M3C, M7C3, M4C3
Carbide type: M3C, M7C3, M4C3
Carbide composition in weight %: No data
Image type: SEM, TEM
Steel name: X40CrMoV5-1
Mat.No. (Wr.Nr.) designation: 1.2344
DIN designation: X40CrMoV5-1
AISI/SAE/ASTM designation: AISI H13
Other designation: No data
Steel group: Hot work tool steels
Steel composition in weight %: No data
Heat treatment/condition: The examinations have been made on the specimens of hot work tool steel X40CrMoV5-1. Test pieces for the examinations have been obtained from the vacuum melt and made as the O.D. 75 mm round bars. The material for specimens has been delivered in the annealed state. Specimens were twice subjected to heat treatment consisting in quenching and tempering, austenizing was carried out in the vacuum furnace of 1020 C with the soaking time 0,5 h. Two isothermal holds were used during heating up to the austenizing temperature, the first at the temperature of 640 C and the second at 840 C. The specimens were tempered twice after quenching, each time for 2 hours at the temperature 560 C and next at 510 C. After heat treatment the surface of specimens were grounded on magnetic grinder. The paste of VC (Fig. 1a) and TaC (Fig. 1b) carbide powders were applied on specimens. All experiments were made at the constant remelting rate, varying the laser beam power in the range from 1.2 ÷ 2.3 kW.
Note: The paper presents investigation results of the structure and properties of alloying surface layer of the X40CrMoV5-1 hot work tool steel, using the high power diode laser HPDL. Tantalum and vanadium carbides powders were used for alloying and the X40CrMoV5-1 conventionally heat treated steel was used as reference material.
Metallographic examinations of the material structures after laser alloying surface layer were made on light microscope and transmission electron microscope. The resistance research has been done with the use of the pin-on-disc method. Hardness tests were made with Rockwell method in C scale.
It was found out in examinations of the surface layer that it can be possible to obtain high quality top layer with better properties compared to material after a standard heat treatment.
In this research two powders (TaC and VC) were used for alloying of the surface layer of investigated steel.
It was found out based on hardness tests results of the
X40CrMoV5-1 alloy hot work steel alloyed with the VC or TaC
carbides powders than laser treatment causes in most cases
hardness increase of the investigated steel.
It was revealed based on examinations on the light
microscope that the remelted zone of the steel subjected to laser
alloying with the vanadium - or tantalum carbides had the
dendritic structure. The dendritic structure occurs during laser
alloying of steel with the TaC in the remelted zone and at the
boundary of the liquid and solid phases boundary, which is
originated according to the heat transfer direction; whereas, in
case of the laser alloying of steel with the VC powder the granular
structure occurs (Fig. 2). Structure of the steel after alloying is
characteristic of occurrences of areas with very differentiated
morphology which is connected with the material solidification.
Clusters of the un - fused carbides of the alloying material occur
in the central area of the remelted zone (Figs. 3 and 4).
Investigations on the transmission electron microscope of thin
foils from the X40CrMoV5-1 steel reveal that structure of this
steel in the hardened and twice tempered state is the tempered
martensite with the dispersive precipitations of the M7C3 type
carbide. Based on examinations of thin foils made from the
surface layer of the hot work tool steel alloyed with the vanadium
- or tantalum carbides the occurrences were observed on grains
boundaries of the relevant carbides used for alloying. Lathe
martensite with the high dislocation density features the matrix of
the surface layer after alloying. Lathes of this martensite are very
fine, with the irregular shape and are twinned to a great extent. In
the martensite of the surface layer of the alloyed steels there are
also fine carbides of the M3C or M7C3 types identified with the
electron diffraction method, and in the steel alloyed with the
vanadium carbide – precipitations of the M4C3 type carbides.
These carbides are located at the martensite lathes boundaries and
at the micro - twins boundaries (Figs.5 and 6).
Links: No data
Reference: Not shown in this demo version.